My brand new Octavia has been out of insurance for more than a year. Recently, I found that the mailbox cover can still be opened even when the car is locked. In order to solve this safety hazard, I bought this model of motor online and referred to the replacement process of my motorists. Today, I finally replaced the motor and the process is sent out for everyone's reference.
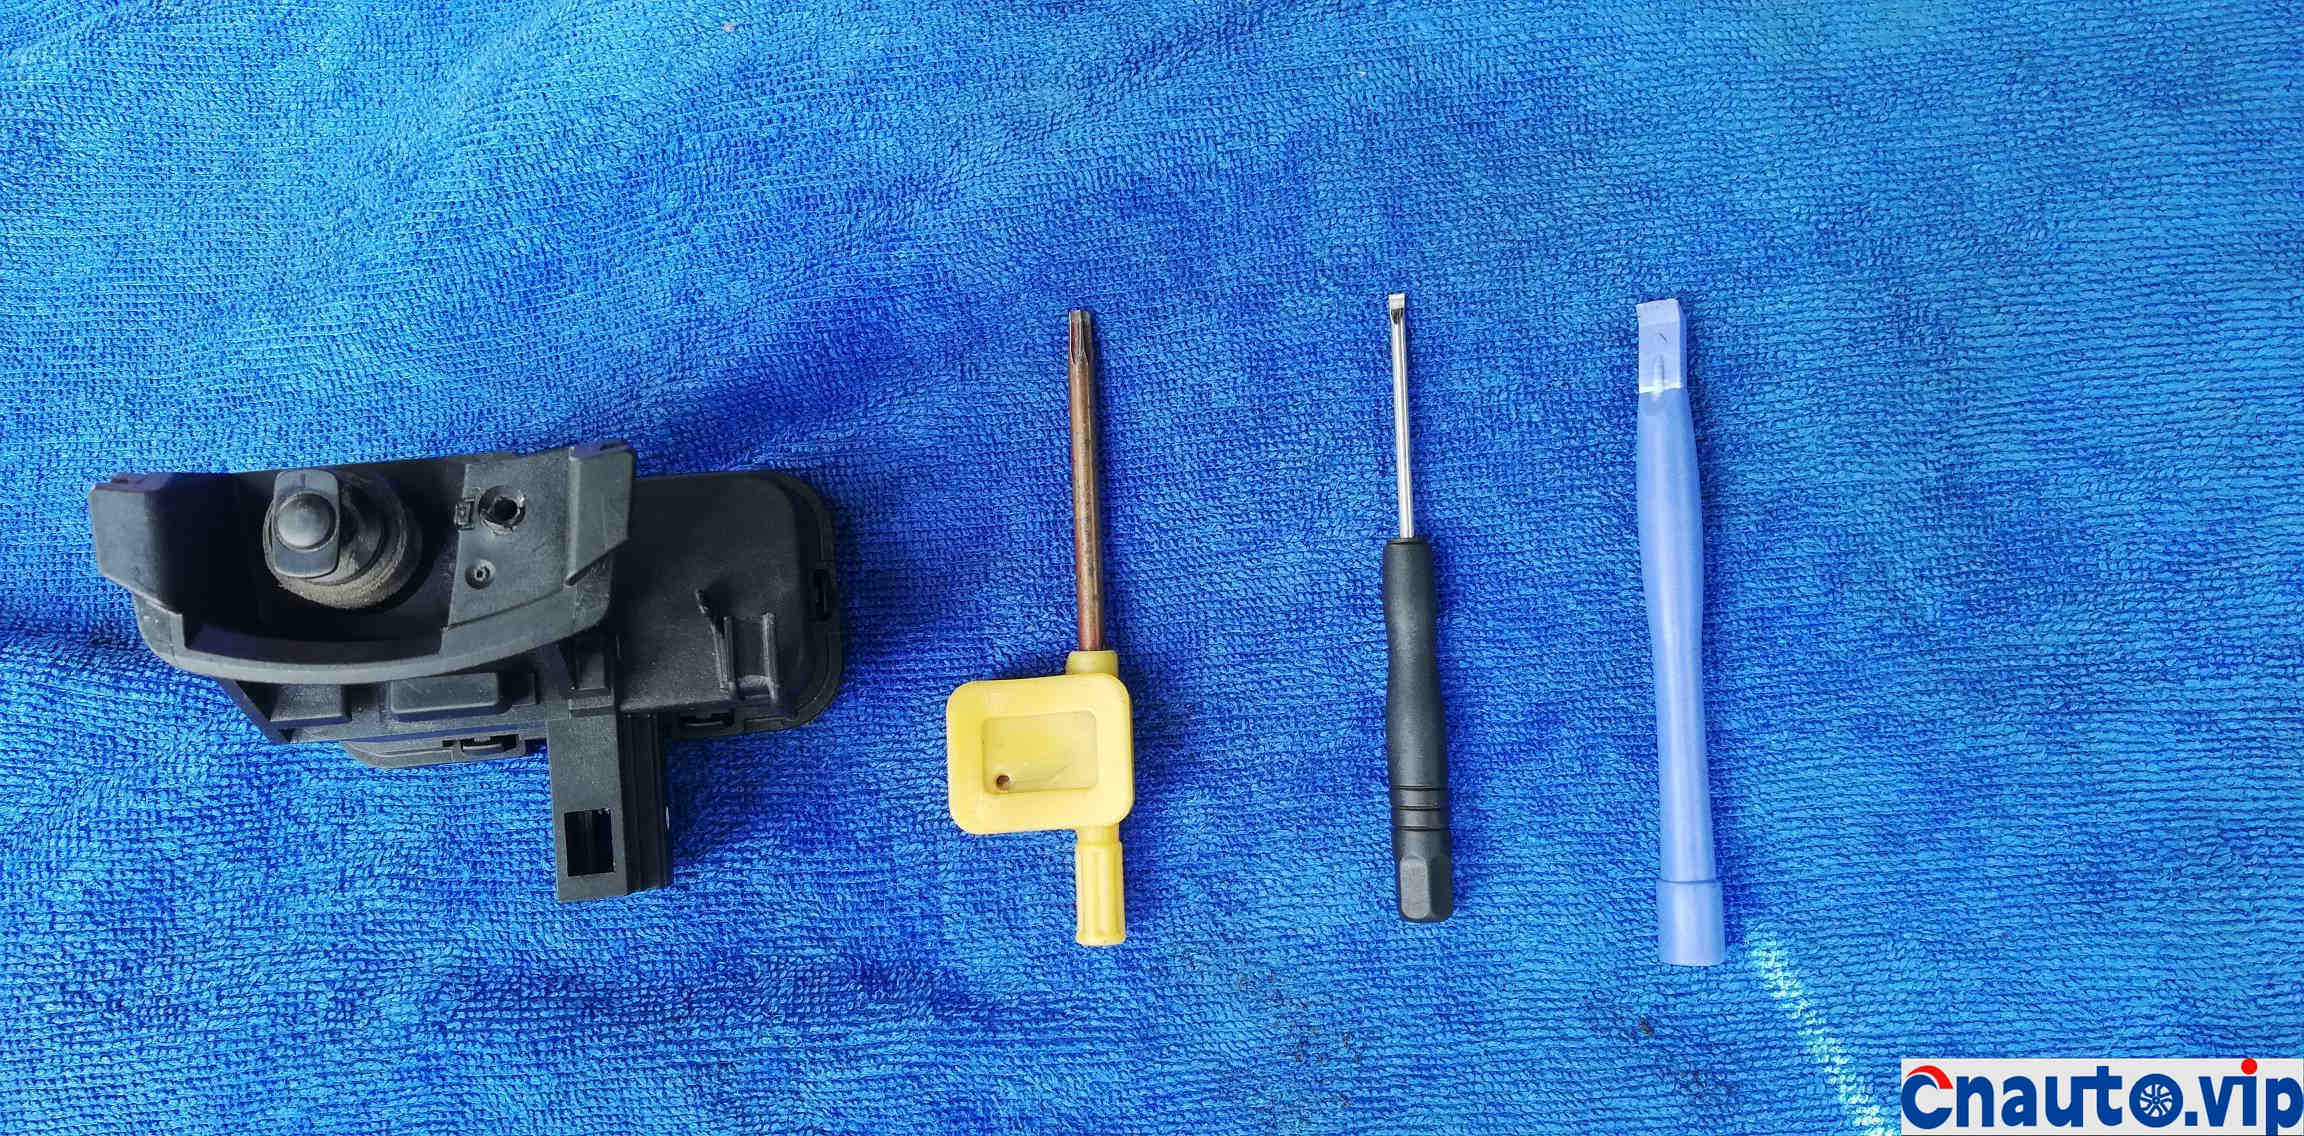
The tools used in this repair are not large but indispensable. Among them, the blue towel is used to block the fuel tank mouth.
Before starting, first put the new and old motors together to compare their shapes. They should be usable.
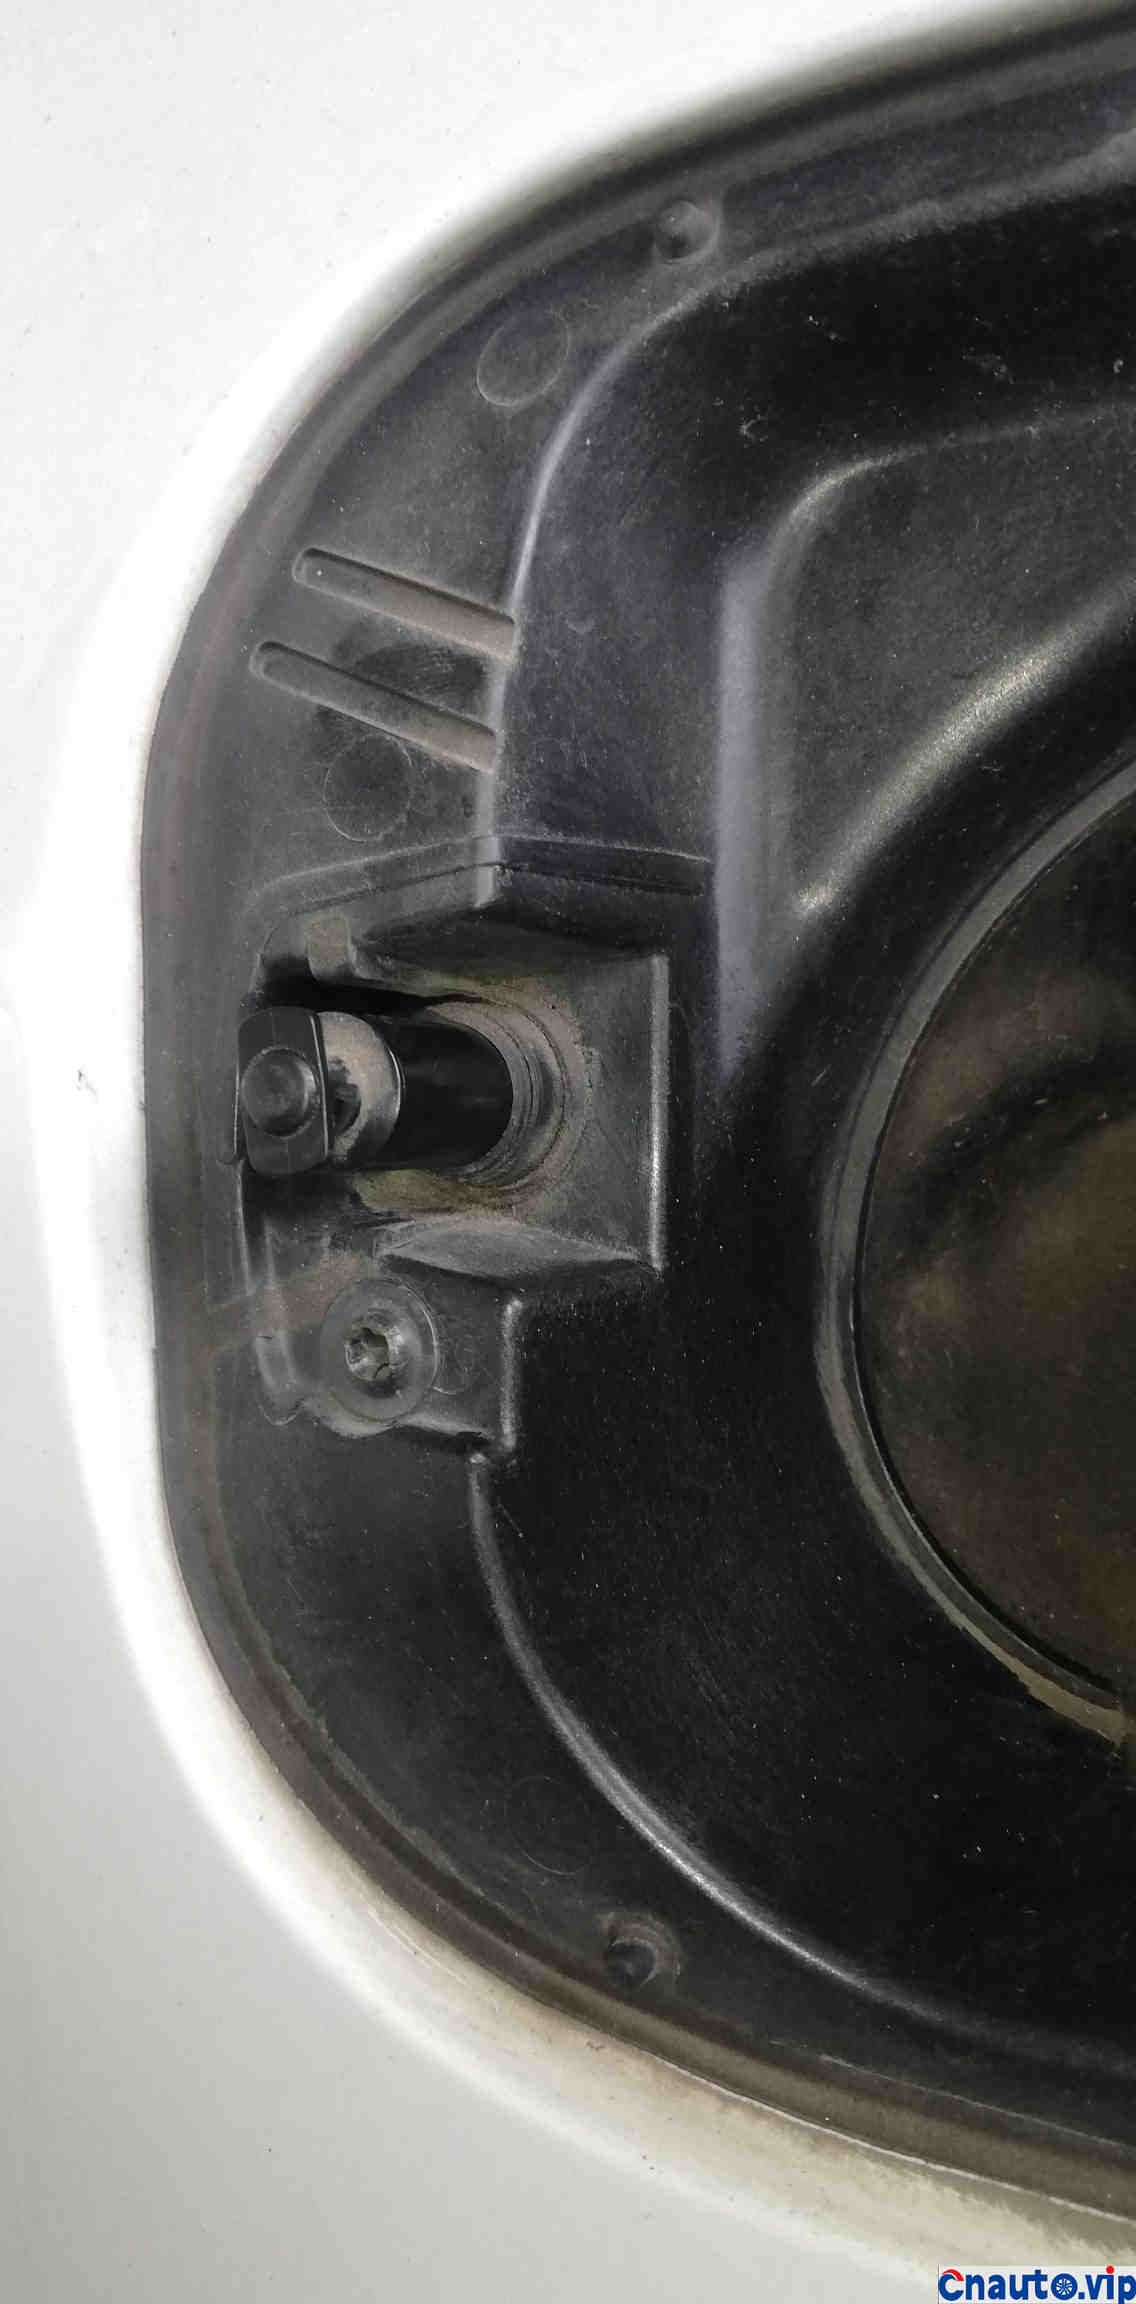
Use a ring wrench to remove this screw. It should be noted that this is a self-tapping screw that can form threads in the smooth hole in the plastic housing of the motor.
Use a plastic crowbar to pry open the black edge and separate the rubber and sheet metal edges along the scored circle of the mailbox. Then pry it in from a place, hold the rubber part with your left hand, and use force with both hands to take out the black sealing ring.
Two points should be noted here:
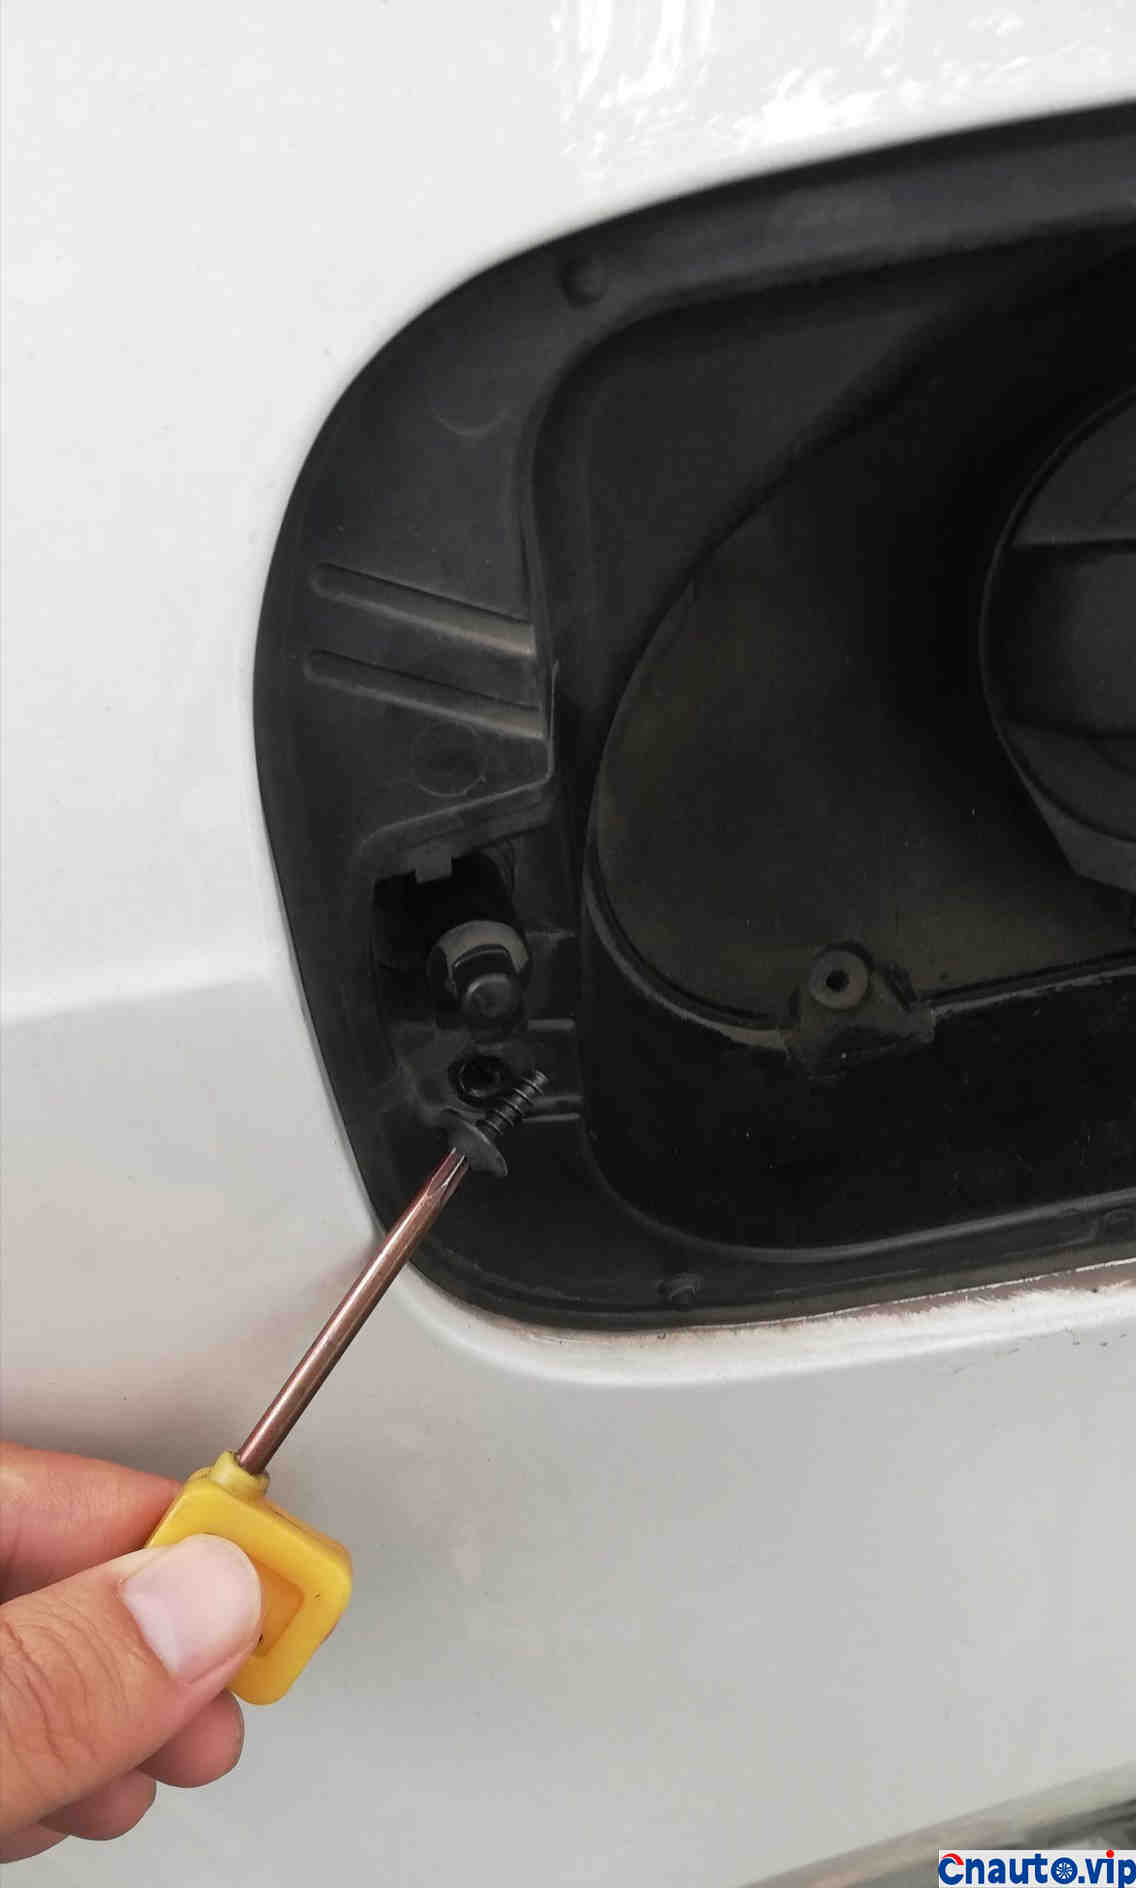
1. Before taking out the sealing ring, block the fuel tank opening with a towel to prevent debris from falling into the fuel tank.
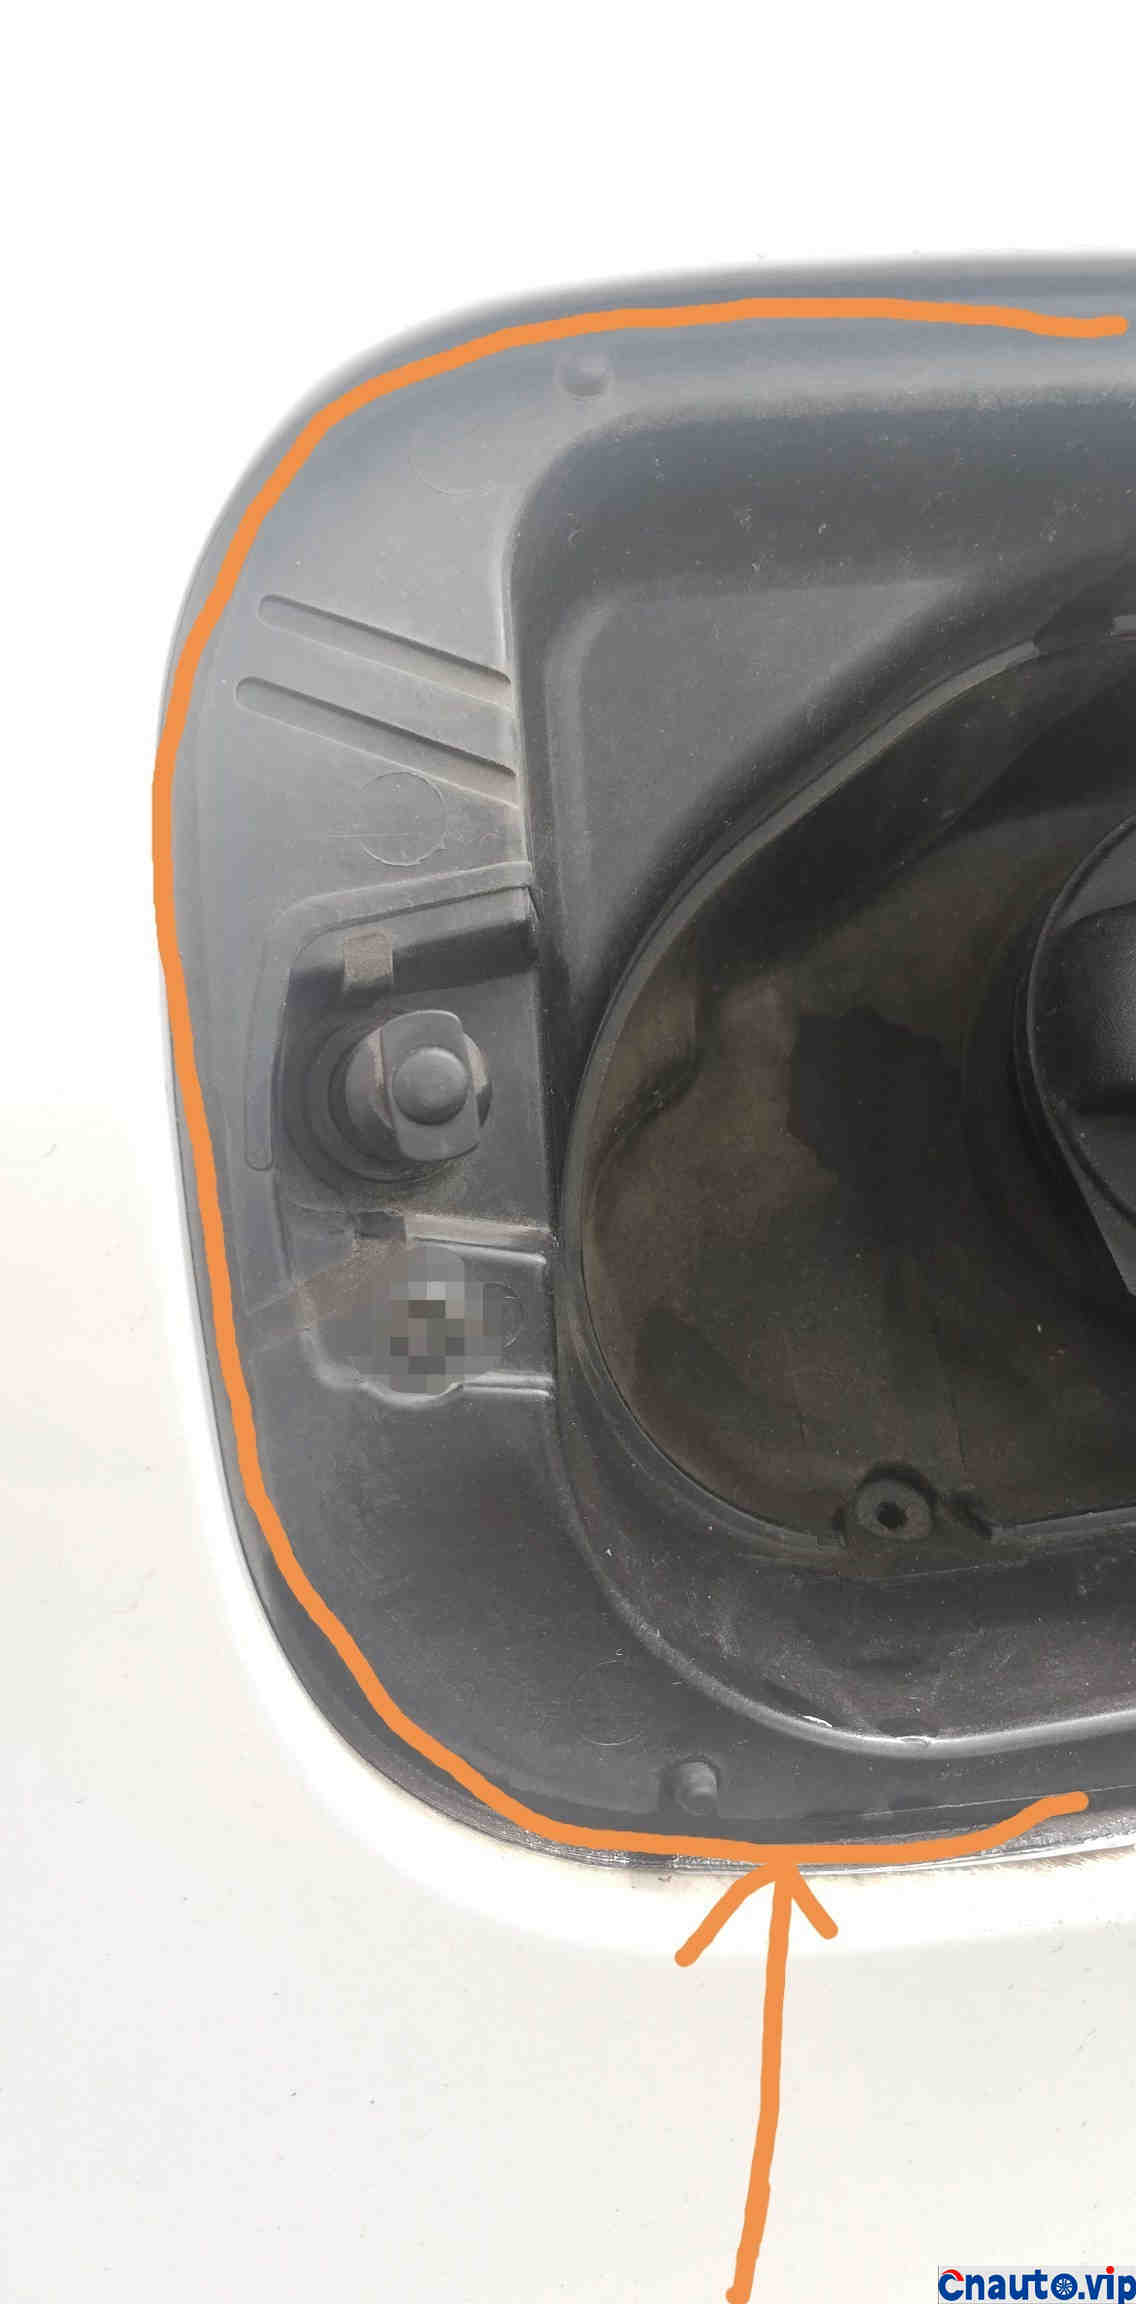
2. The left half of the seal ring is easy to remove, and the section of the right hinge connected to the cover is hidden behind the sheet metal part. The entire seal ring needs to be pulled to the left before taking it out.
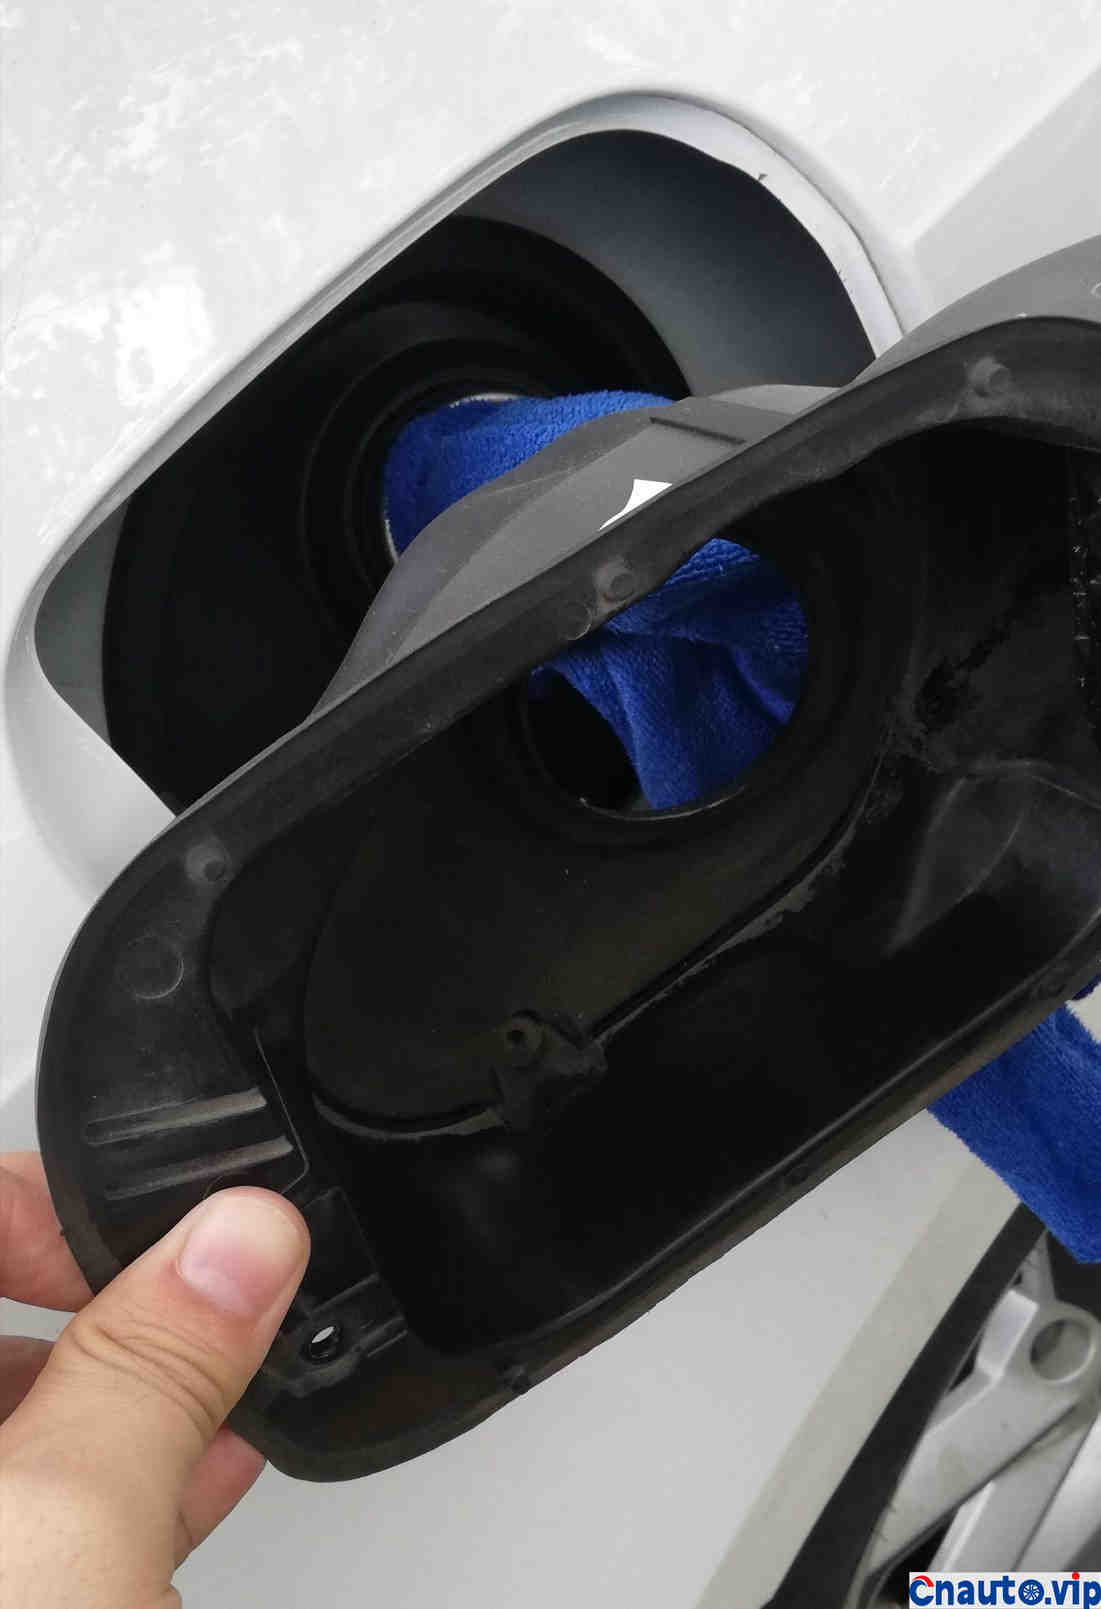
Remove the sealing ring and pay attention to blocking the fuel tank opening
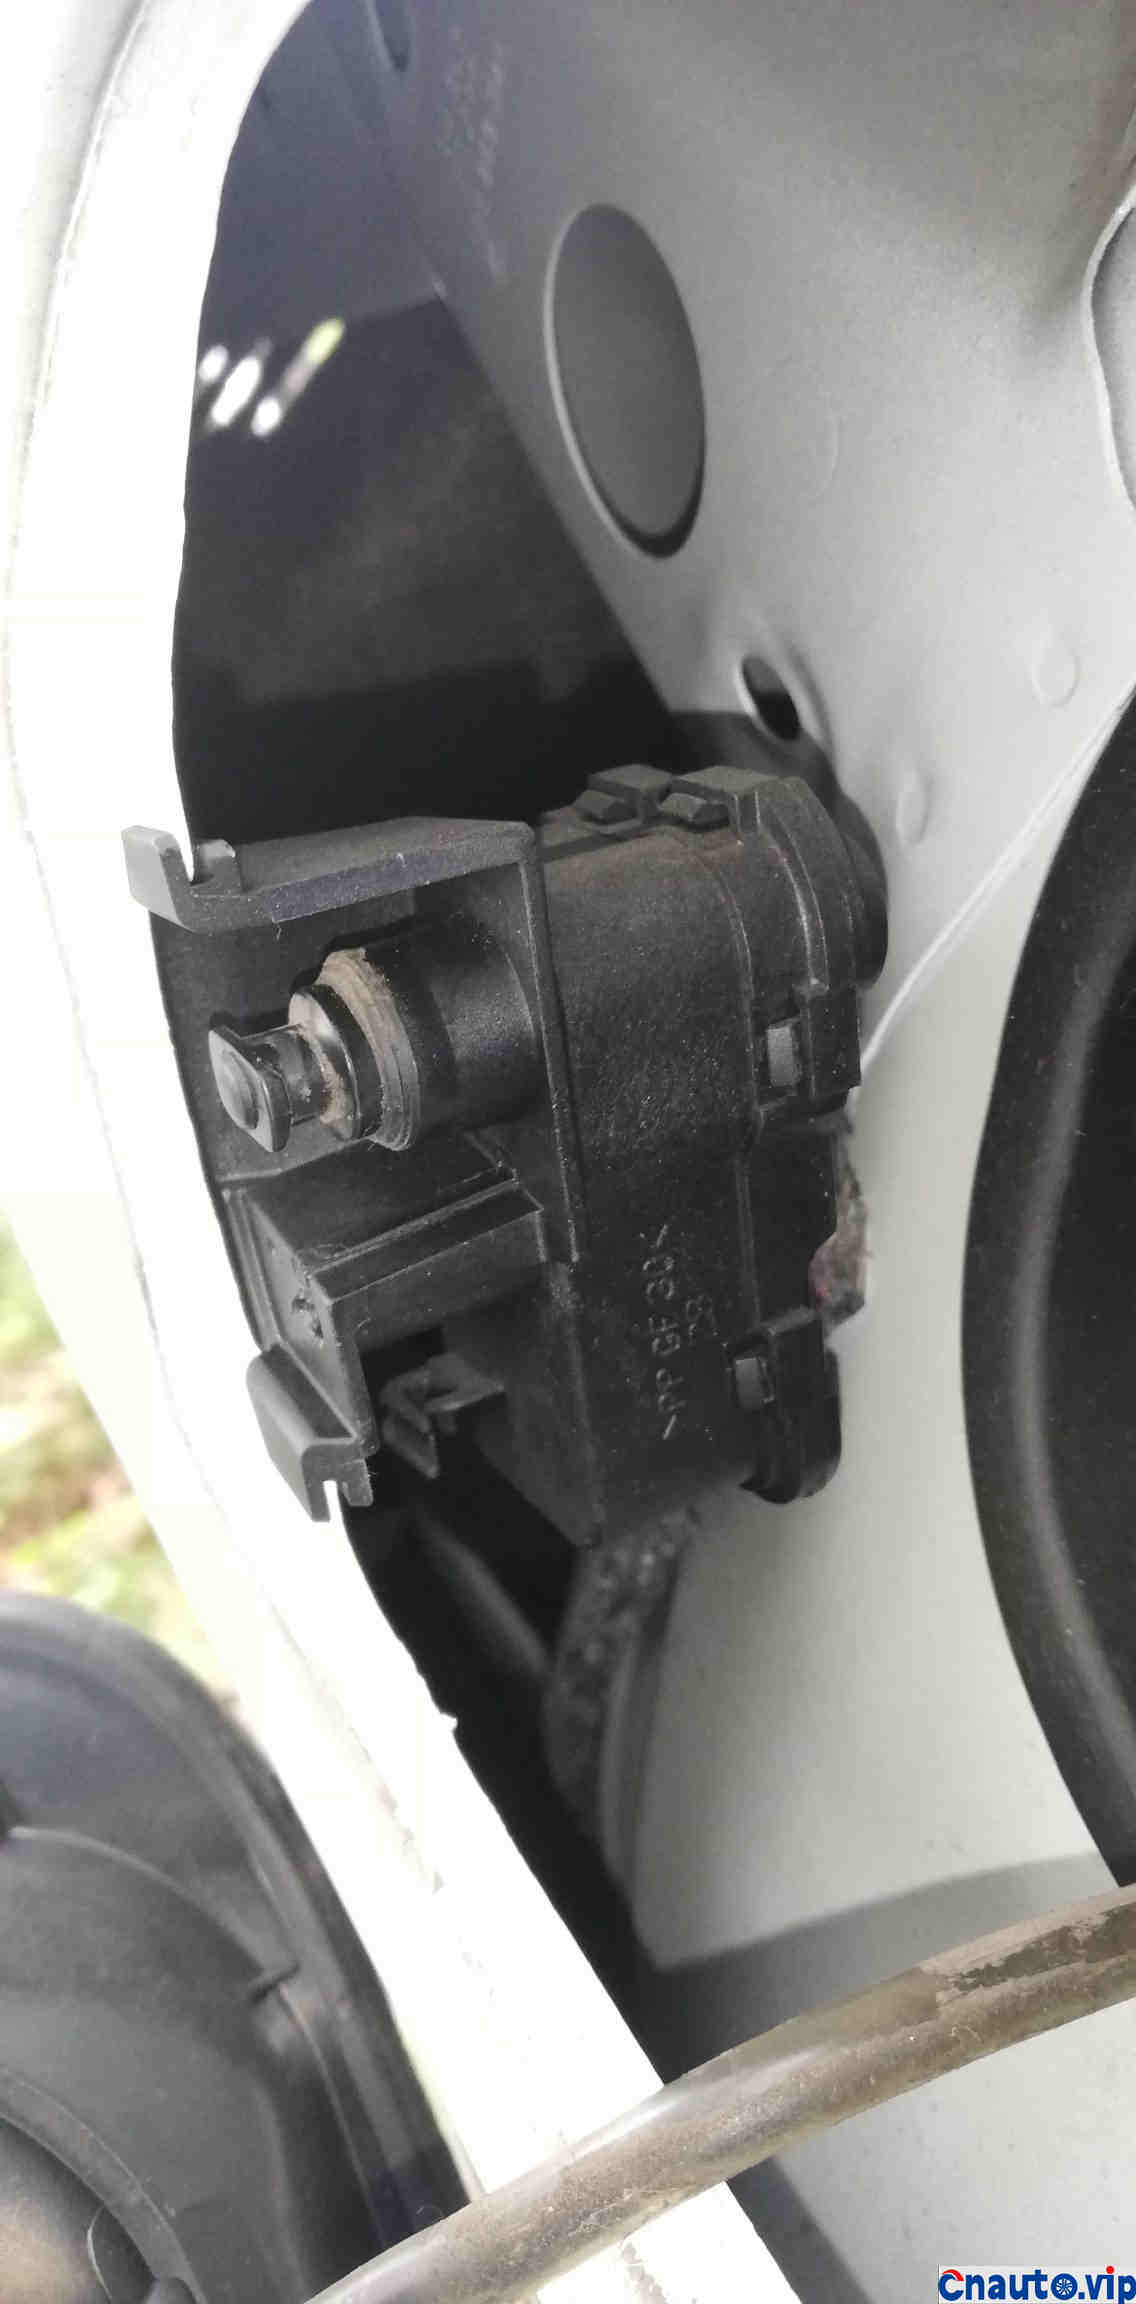
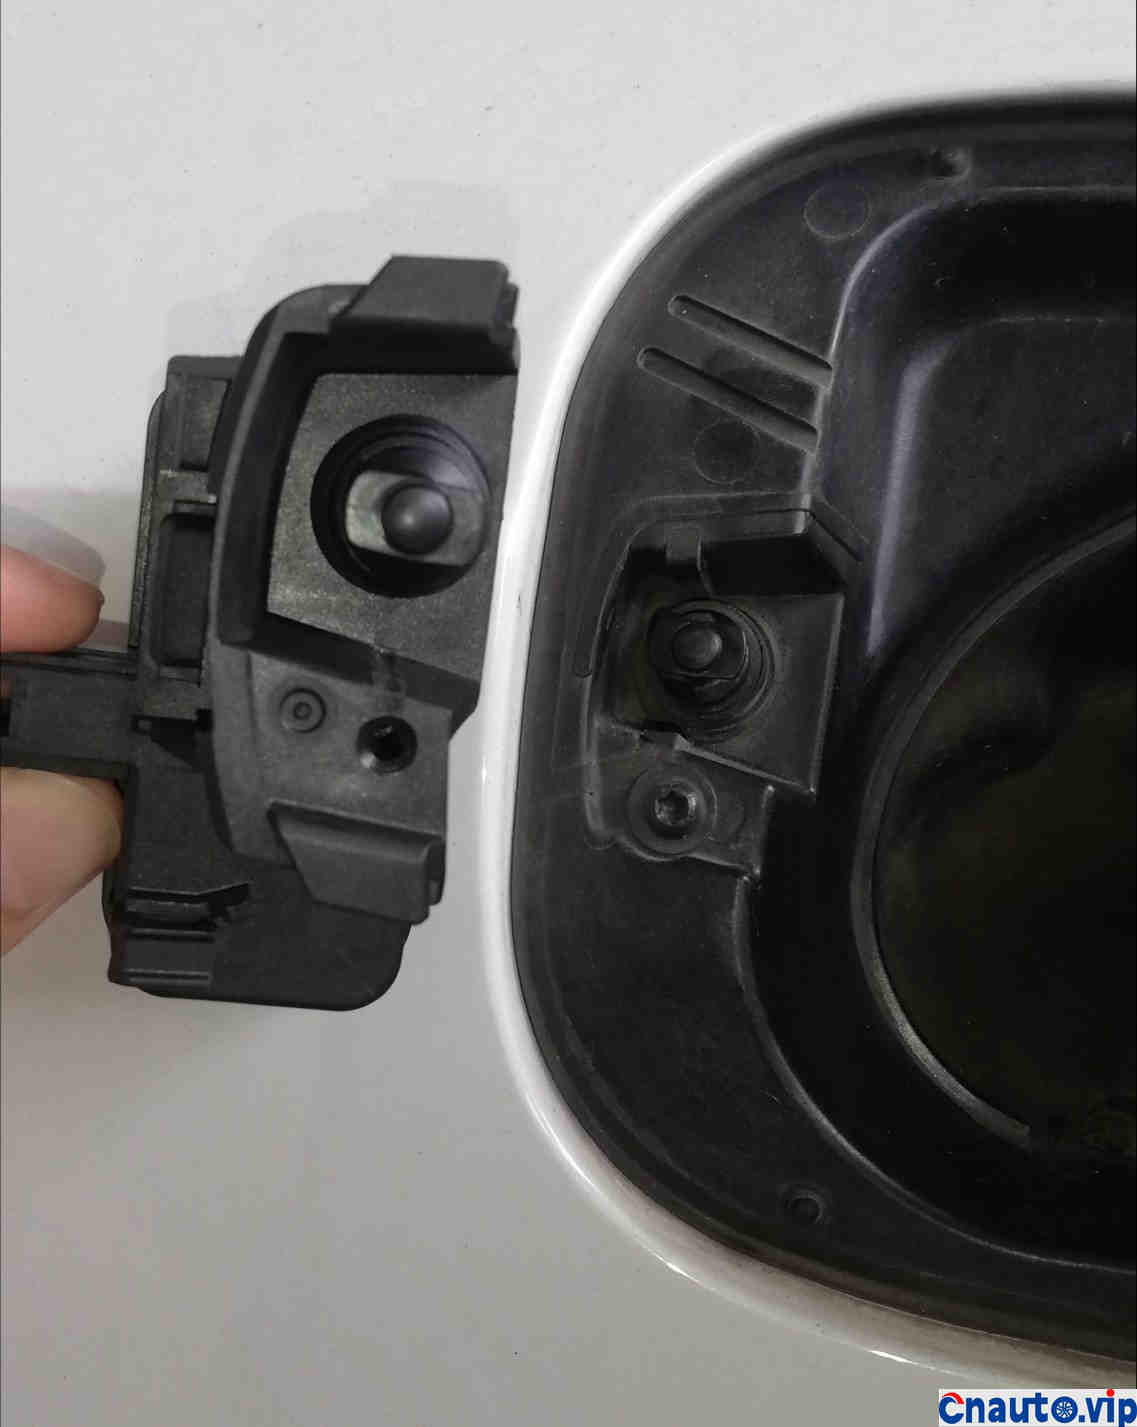
From the right, you can see that the two ears of the motor are stuck on the edge of the sheet metal part and can be pulled out later. Among them, there is a pipe in a conspicuous position in the picture. This is the pipe from the leaking hole in the sealing ring of the fuel tank cap.
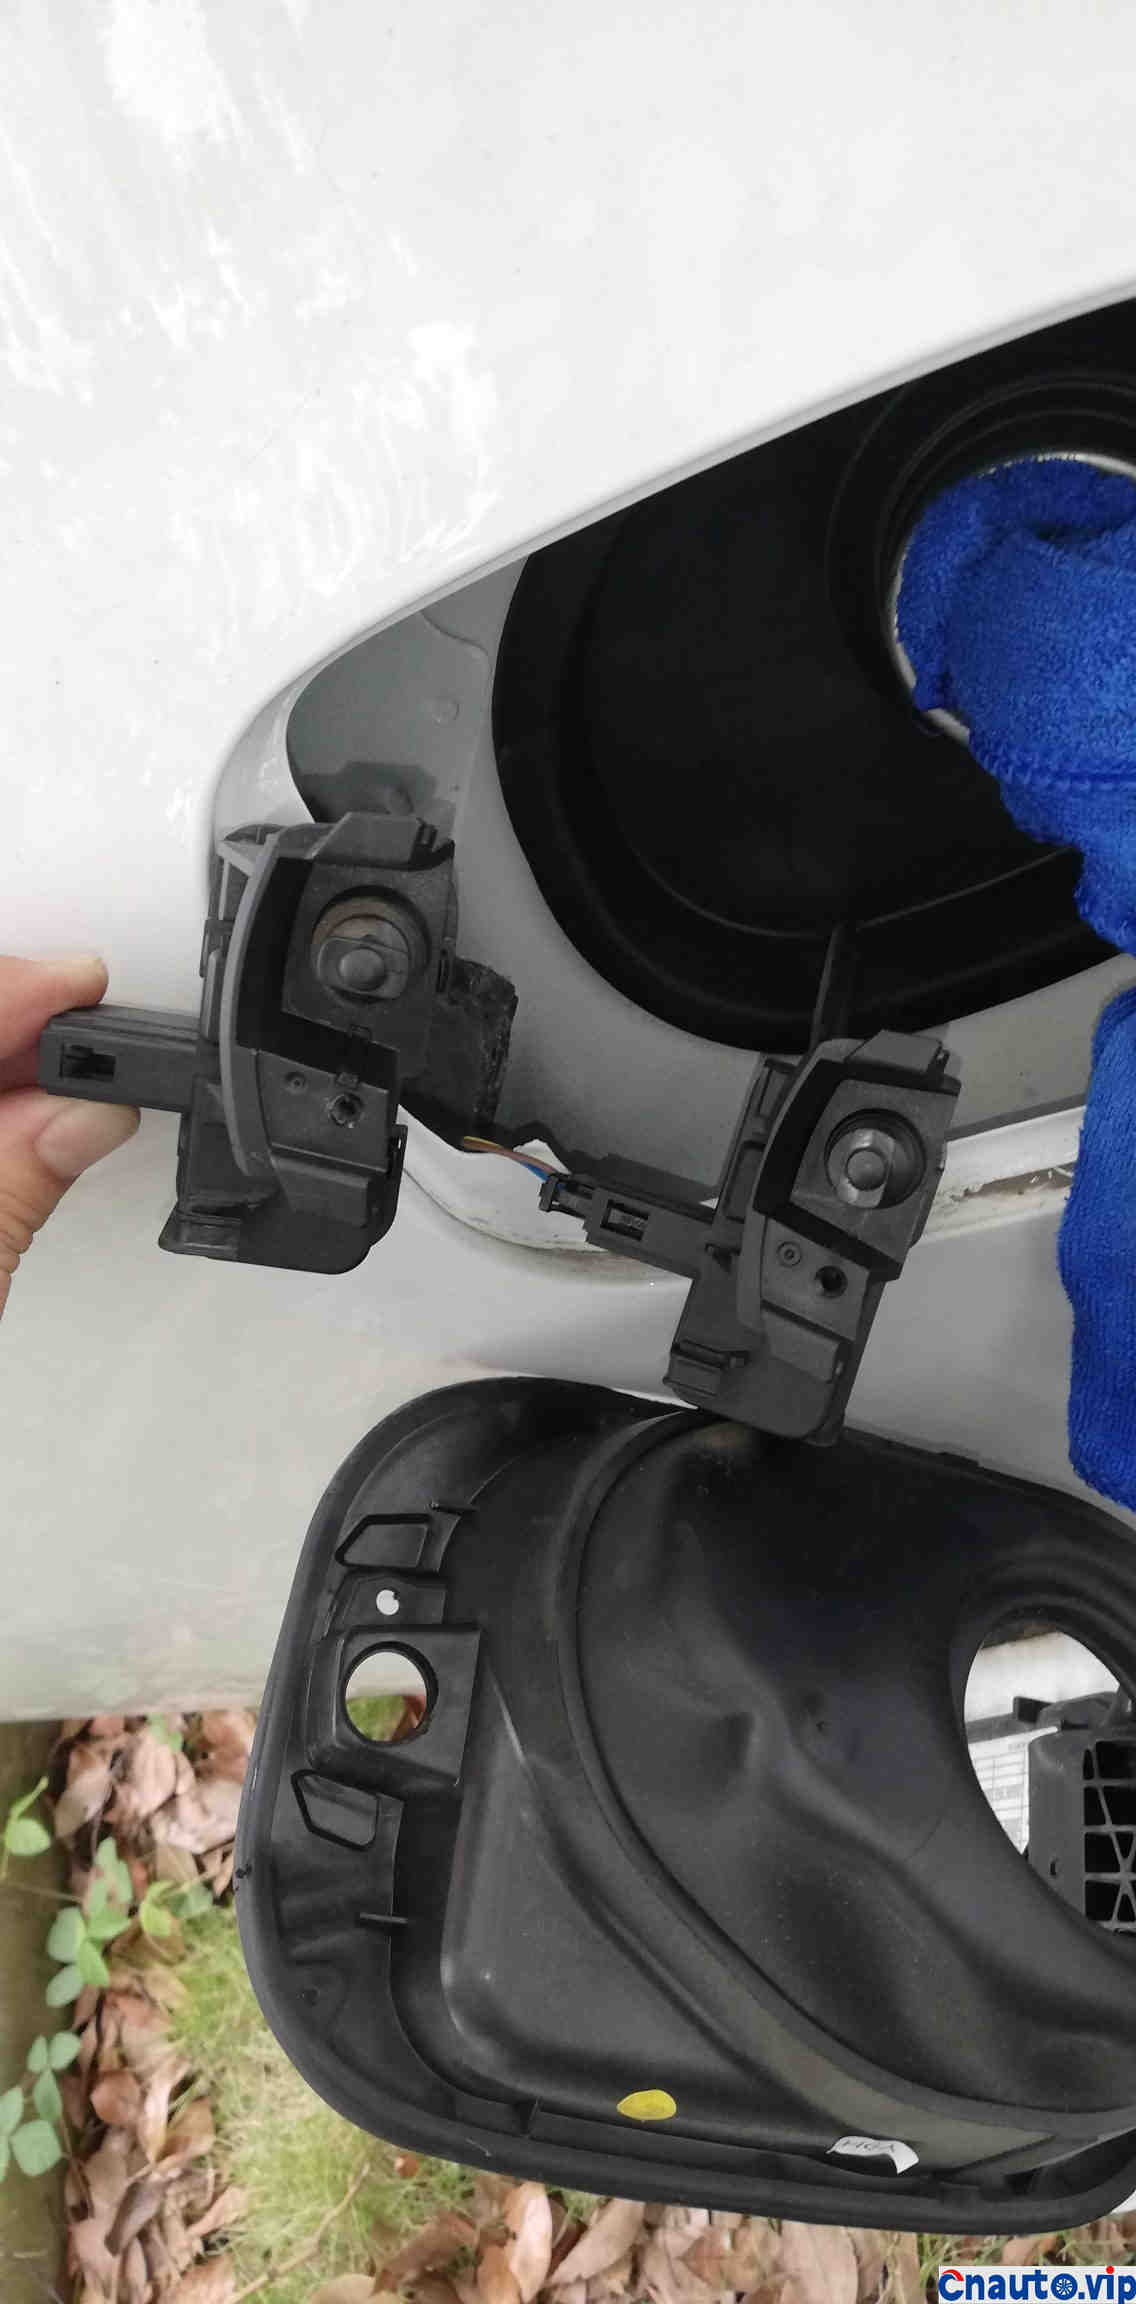
Pull out the motor and sealing ring, and you can see that the motor is connected to a power cord. Put the new motor and the old motor together and draw it together. The shape is the same, and you can proceed with the next step with confidence.
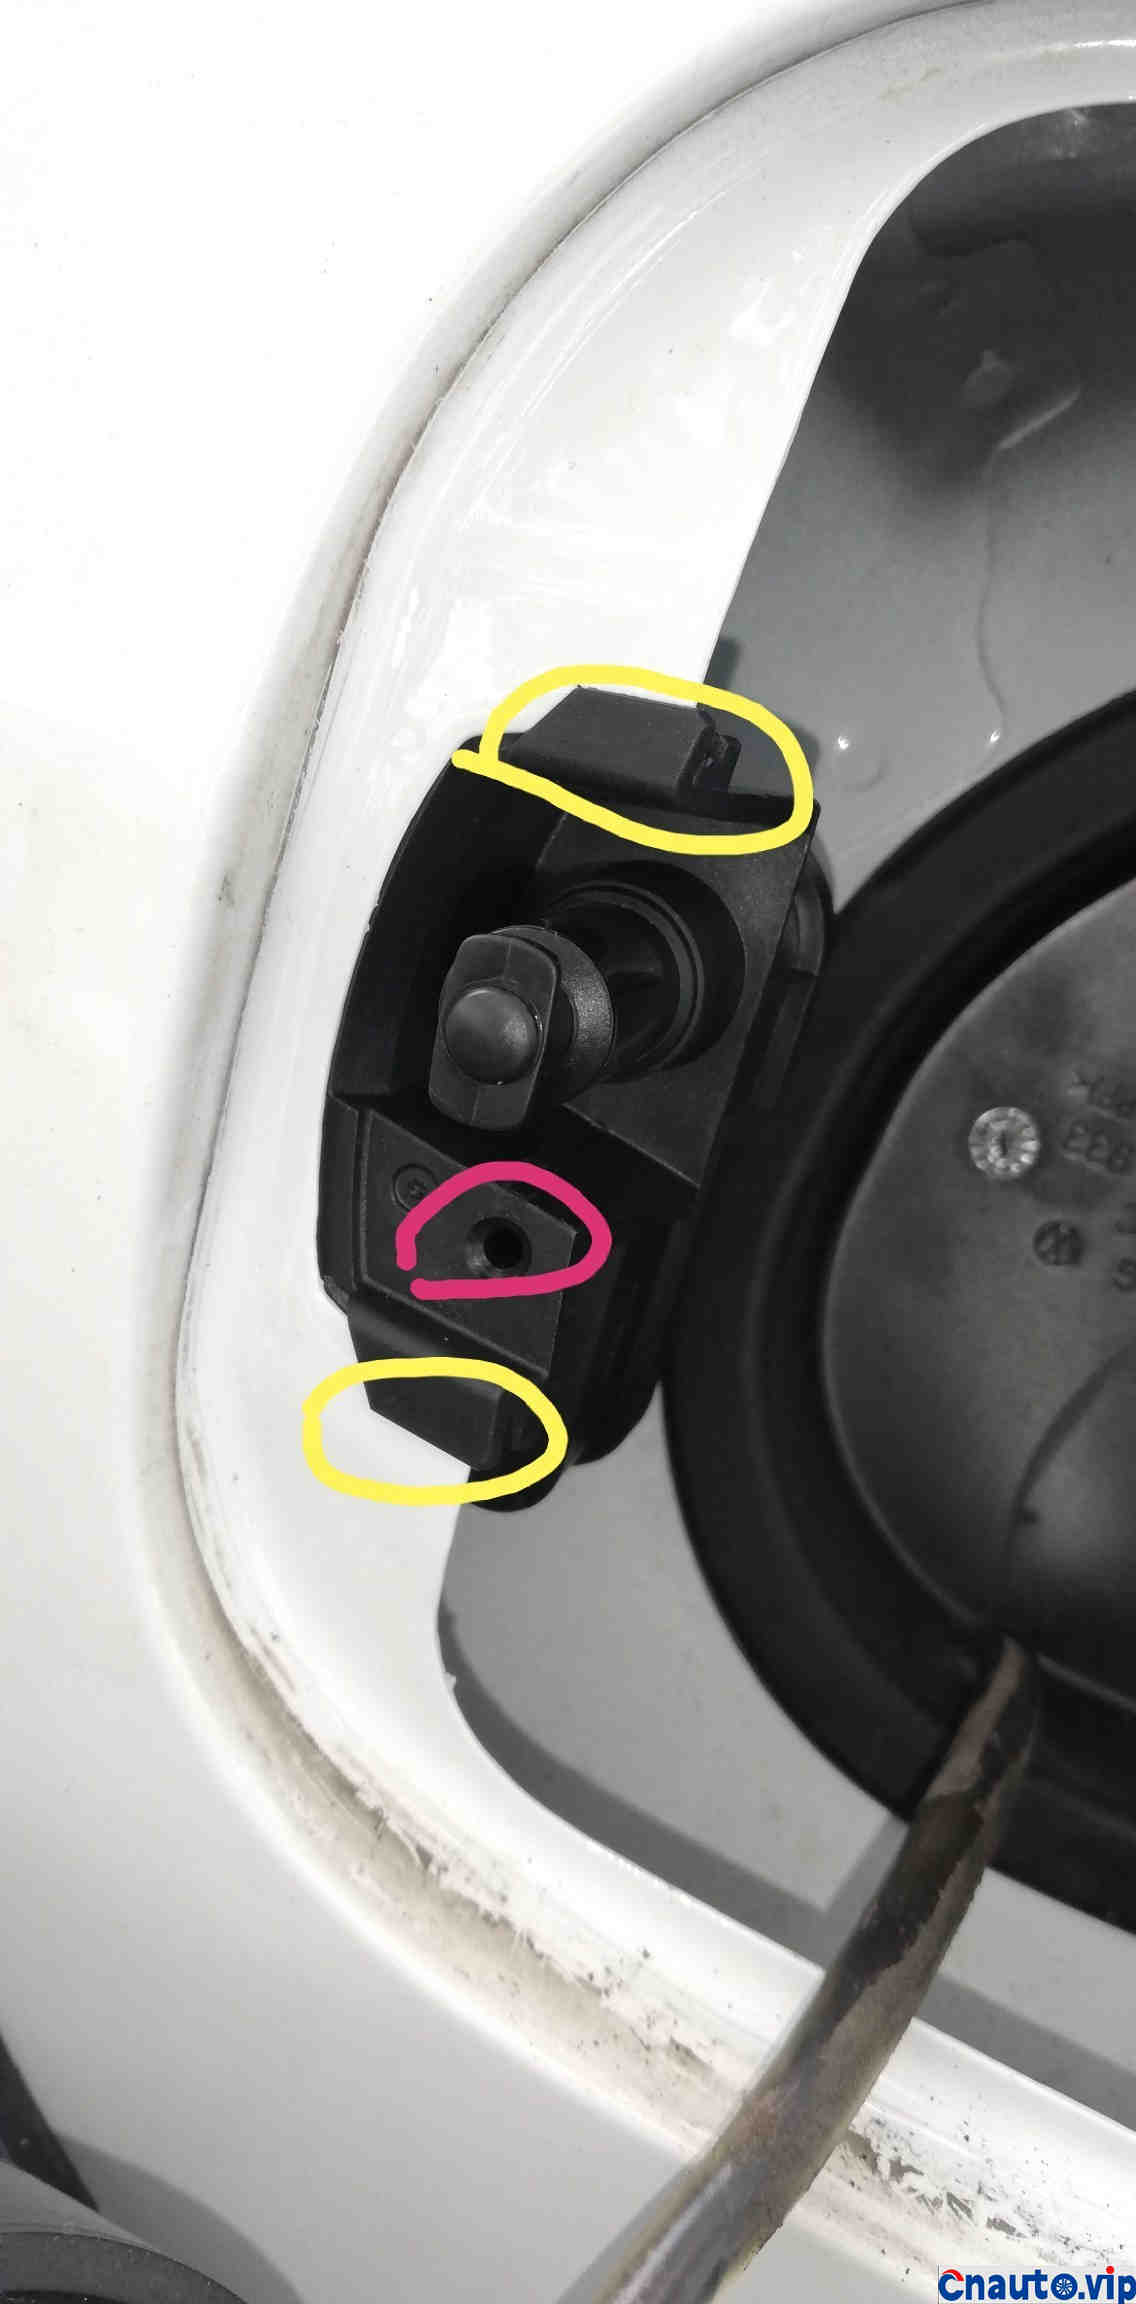
First replace the buckle of the power cord with the new motor socket, test it with the key switch, and it can be locked. In addition, note that before installation, it is best to use the self-tapping screws to tighten them in the red circle to prevent them from being difficult to tighten during final assembly. Two yellow locations are clamped tightly on the edge of the sheet metal.
Install the sealing rings in the reverse order, restore them to their original state, and test that the motor is working normally again.
The motor replacement process is over for reference only, thank you